product-resources
Puma Scan Professional Server and Azure DevOps editions have recently introduced new options for output file formats - Static Analysis Results Interchange Format and SonarCloud. In this blog, we will focus on Static Analysis Results Interchange Format.
Static Analysis Results Interchange Format (SARIF) seeks to be the industry standard format for static analysis tools, just as Puma Scan Professional strives to be the preferred static analysis tool for C# projects. Seems like a perfect fit!
Let’s see how to make the most use of the SARIF output format in a Azure DevOps pipeline.
The SARIF output format is available in Puma Scan Professional Azure DevOps editions starting in version 1.1.3. The pipeline will automatically use this version if you have it set to use version 1.*.
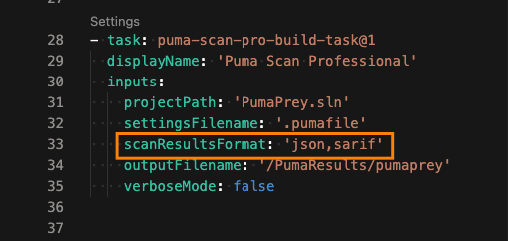
For YAML pipelines, add the sarif value to the scanResultsFormat input.

Setting SARIF Scan Results in a YAML Azure DevOps pipeline in the Puma Scan Professional task
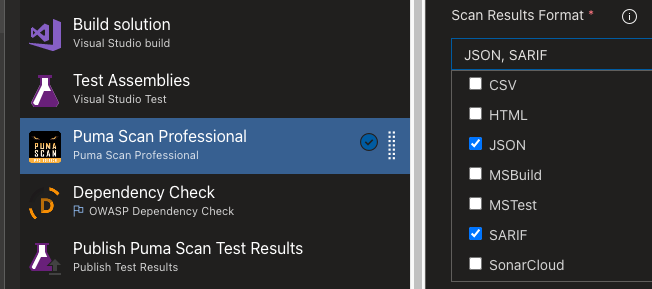
For Classic pipelines, selecting the “SARIF” in the Scan Results Format drop down will enable the SARIF output.

Selecting SARIF Scan Results in a Classic Azure DevOps Pipeline in the Puma Scan Professional task
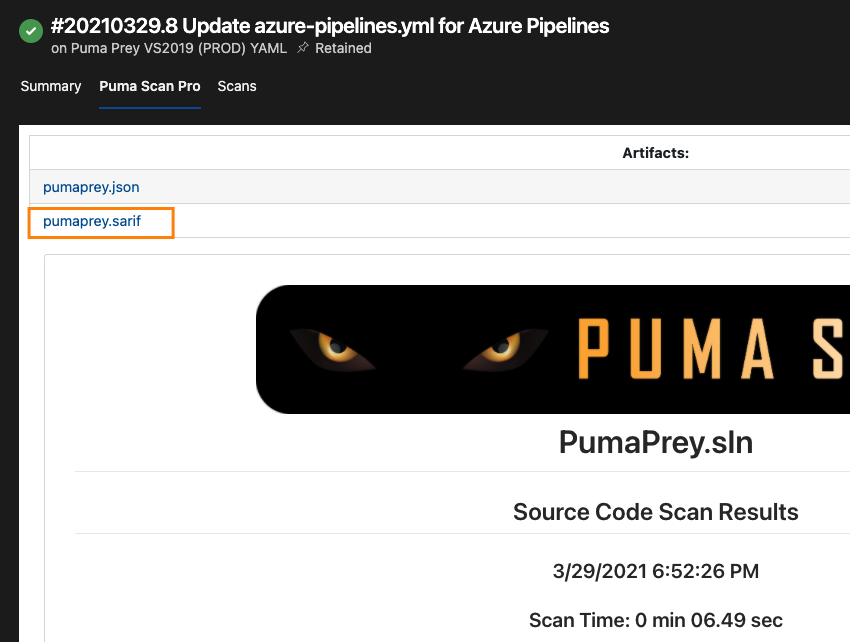
Once the Puma Scan Professional step is complete, the SARIF artifact can be consumed by additional Azure DevOps steps. An example is a publish step to export the SARIF artifact into a vulnerability management system, or an issue tracking system. By default, the Puma Scan Professional SARIF artifact will be available on the Puma Scan Professional tab of the pipeline’s Run summary.

The Puma Scan Professional SARIF file is located on the Run’s Puma Scan Pro tab
We can display results in the pipeline’s Run summary via Microsoft DevLabs’ SARIF SAST Scans Tab extension. To begin, visit the Visual Studio Marketplace and search for the SARIF SAST Scans Tab extensions or visit this page. Follow the instructions in the Marketplace to install the extension in your Azure DevOps organization.
Once installed, a tab will appear in your pipeline’s Run summary named “Scans”. The tab will display a message informing you that no SARIF logs have been found. To remedy this, the pipeline will need to be configured to publish the Puma Scan SARIF file to the “CodeAnalysisLogs” artifact.
To publish the SARIF file to “CodeAnalysisLogs” artifact, add a “Publish build artifacts” step to your pipeline. The PathtoPublish and ArtifactName inputs will need to be set as:

The "PathtoPublish" input is set to the location in the Puma Scan Professional’s SARIF output. The "ArtifactName" input is set to "CodeAnalysisLogs", as required by the SARIF SAST Scans Tab extension
Please note! As of the time of this writing, the SARIF SAST Scans Tab wasn’t able to consume SARIF files published by the “Publish Pipeline Artifact” Azure DevOps task. Please make sure you’re using the “Publish build artifacts” Azure DevOps task.
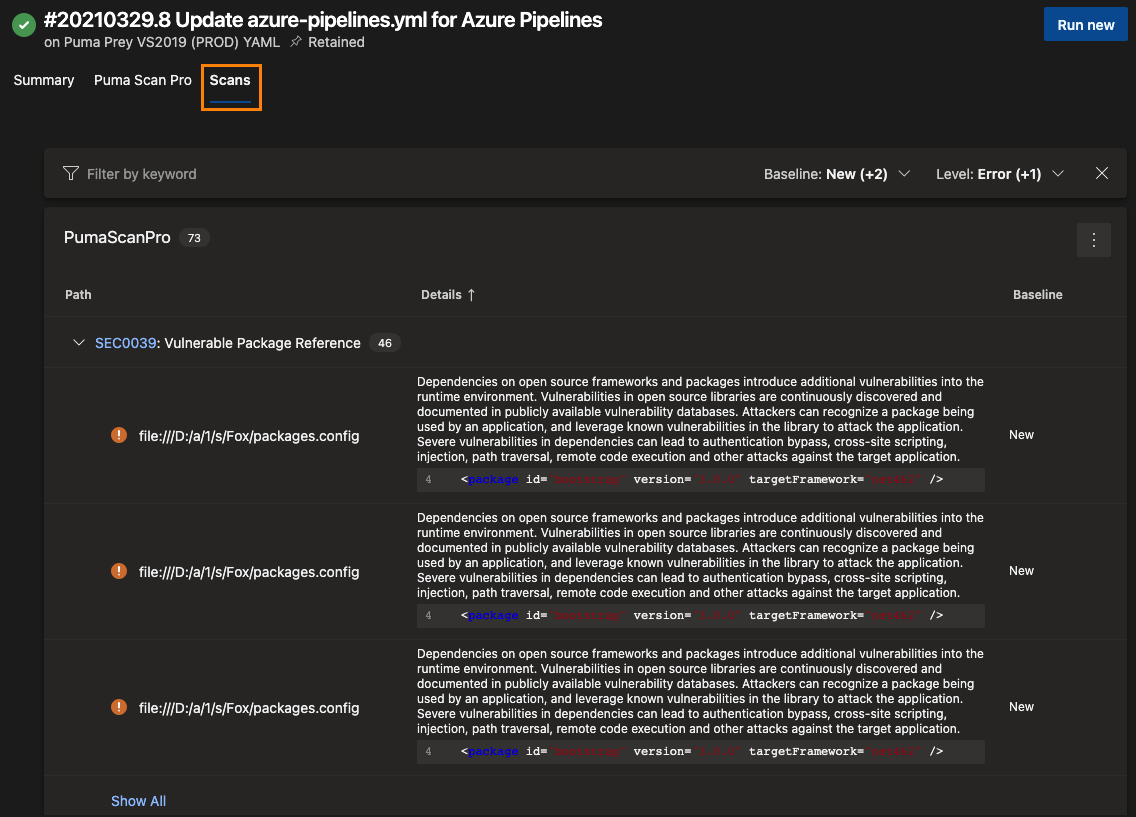
Now that you have the SARIF files published to the appropriate artifact name, it’s time to run the pipeline again. After the pipeline run is complete, visit the “Scans” tab. If any vulnerabilities were detected by Puma Scan Professional, details about the vulnerabilities will be displayed.

The Puma Scan Professional SARIF output file is visually displayed in the SARIF SAST Scans tab extension
We hope that the additional SARIF file format will enhance your organization’s ability to manage and mitigate vulnerabilities. Please let us know how the SARIF format in Puma Scan Professional is working for you!